I remember sometime ago, I've promised to share this pattern with you... my
post backdated to June 2010...wow that's really long!! Anyway better late than never...right. Basically I thought I would just like to share the link to the similar pattern which I came across in the Internet...but I just couldn't find it. So what I did, I just write the pattern by myself by referring to the booties that I've made for my niece.
Simple Baby Booties pattern
Materials:
Yarn
Steel Hook no. 5(Tulip)
ch 4, slst to make a circle
Rd 1 : ch 3, 9 dc into the circle (10 dc),
Rd 2 : ch 3, dc into same st, 2 dc into each st around (22 dc)
Rd 3 -6 : ch 3, 1 dc into each st around
Rd 4 : ch 3, dc into next 18 st, leaving 5 unworked. ch 3, turn and work 18 dc back and forth until the sole is as long as the baby’s foot (you have to measure the baby sole).
Seam up at the back together, and then work about 2 rounds of single crochet around the edge and decreasing at each of the corners
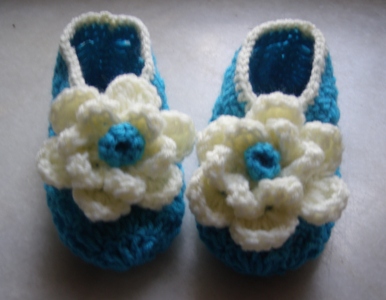
That’s it! You’re DONE!! You can make a complete pair in less than an hour. The best part is on how you want to decorate your baby booties. I attached here what I’ve did to my baby booties. For boys I decorate with blue pompom (
using pompom basically quite universal, it can be for girls too…you can play with the color) and for my girl version I decorate with a flower.

Ok... that’s about it for today. If you have any questions on the pattern please leave them in the comment and I'll try to answer them in that post! :)
If you use any of my patterns, I would appreciate it if you could link to my blog. I also LOVE to see and share yours on my blog ... so let me know;)
Thanks for reading...and ENJOY your weekend…
 I've completed crocheting aviator hat, an order from Ms. Hong for her first baby... AND this stripe mushroom rattle is a free gift from me for her baby. Hope she likes it!!